A relay wiring diagram for Arduino is a visual representation of how to connect an Arduino microcontroller to a relay module. It shows the electrical connections between the Arduino's digital output pins and the relay's input and output terminals. By following the diagram, you can control the relay using the Arduino's digital outputs.
Relay wiring diagrams are important because they ensure that the relay is connected correctly and safely. If the relay is not wired correctly, it could damage the Arduino or the relay itself. In addition, relay wiring diagrams can help you to troubleshoot problems with your relay circuit.
There are many different types of relay wiring diagrams, depending on the type of relay and the Arduino you are using. However, most relay wiring diagrams follow the same basic principles. Here are the steps on how to wire a relay to an Arduino:
- Connect the Arduino's digital output pin to the relay's input terminal.
- Connect the relay's output terminal to the device you want to control.
- Connect the Arduino's ground pin to the relay's ground terminal.
Once you have wired the relay to the Arduino, you can control the relay using the Arduino's digitalWrite() function. When the digitalWrite() function is set to HIGH, the relay will turn on. When the digitalWrite() function is set to LOW, the relay will turn off.
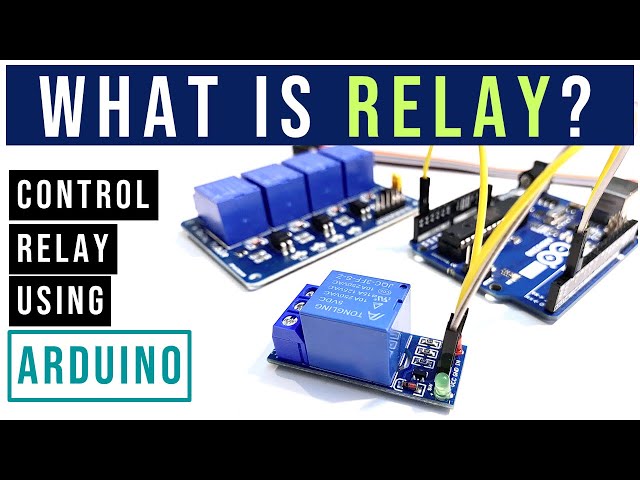
Relay Wiring Diagram Arduino
A relay wiring diagram for Arduino is a visual representation of how to connect an Arduino microcontroller to a relay module. It shows the electrical connections between the Arduino's digital output pins and the relay's input and output terminals. By following the diagram, you can control the relay using the Arduino's digital outputs.
- Circuit Diagram: A visual representation of the electrical connections between the Arduino, relay, and other components.
- Digital Output: The Arduino's digital output pins are used to control the relay.
- Input Terminal: The relay's input terminal is connected to the Arduino's digital output pin.
- Output Terminal: The relay's output terminal is connected to the device you want to control.
- Ground Terminal: The Arduino's ground pin is connected to the relay's ground terminal.
- Normally Open (NO): The relay's normally open terminal is connected to the device you want to control.
- Normally Closed (NC): The relay's normally closed terminal is connected to the device you want to control.
- Common Terminal: The relay's common terminal is connected to the Arduino's ground pin.
These key aspects are essential for understanding how to wire a relay to an Arduino. By following the diagram and connecting the components correctly, you can use the Arduino to control a variety of devices.
Circuit Diagram
A circuit diagram is a visual representation of the electrical connections between the Arduino, relay, and other components. It is an essential part of a relay wiring diagram for Arduino, as it shows how the components are connected together and how the circuit will function.
Circuit diagrams are important because they allow you to troubleshoot problems with your circuit. By following the diagram, you can see how the components are connected and identify any potential problems. In addition, circuit diagrams can help you to understand how the circuit works and how to modify it to meet your specific needs.
Here is an example of a circuit diagram for a relay wiring diagram for Arduino:
[Image of a circuit diagram for a relay wiring diagram for Arduino]
In this diagram, the Arduino is represented by the blue rectangle, the relay is represented by the green rectangle, and the other components are represented by the yellow rectangles. The lines connecting the components represent the electrical connections.
By following the circuit diagram, you can see how the Arduino is connected to the relay and how the relay is connected to the other components. This information can help you to troubleshoot problems with your circuit and to understand how the circuit works.
Digital Output
In a relay wiring diagram for Arduino, the digital output pins of the Arduino are used to control the relay. This is because the Arduino's digital output pins can be set to either HIGH or LOW, which corresponds to turning the relay on or off. By controlling the state of the digital output pins, the Arduino can control the state of the relay, and thus control the device that is connected to the relay's output terminals.
For example, a relay wiring diagram for Arduino could be used to control a light bulb. In this example, the Arduino's digital output pin would be connected to the relay's input terminal. The relay's output terminals would be connected to the light bulb. When the Arduino's digital output pin is set to HIGH, the relay will turn on and the light bulb will light up. When the Arduino's digital output pin is set to LOW, the relay will turn off and the light bulb will turn off.
Understanding the connection between digital output and relay wiring diagrams for Arduino is important because it allows you to control devices using the Arduino. By connecting the Arduino's digital output pins to the relay's input terminals, you can use the Arduino to turn devices on and off, or to control other aspects of their operation.
Input Terminal
In a relay wiring diagram for Arduino, the connection between the relay's input terminal and the Arduino's digital output pin is crucial for controlling the relay's operation. This connection allows the Arduino to send a signal to the relay, which determines whether the relay's output terminals are connected or disconnected.
- Relay Control: The Arduino's digital output pin provides a digital signal that controls the state of the relay. When the digital output pin is set to HIGH, the relay's input terminal receives a voltage that activates the relay, causing its output terminals to connect. Conversely, when the digital output pin is set to LOW, the relay's input terminal receives no voltage, deactivating the relay and disconnecting its output terminals.
- Digital Signal Interface: The Arduino's digital output pin operates at a digital voltage level, typically 5 volts. This digital signal is compatible with the input requirements of most relays, allowing for direct connection without the need for additional circuitry.
- Circuit Simplicity: By connecting the relay's input terminal directly to the Arduino's digital output pin, the relay wiring diagram for Arduino becomes simpler and more straightforward. This reduces the number of components and connections required, making the circuit easier to assemble and troubleshoot.
- Versatility and Expandability: The use of the Arduino's digital output pins provides versatility in controlling multiple relays. Each digital output pin can be connected to a separate relay, allowing the Arduino to control multiple devices or circuits independently.
Understanding the connection between the relay's input terminal and the Arduino's digital output pin is essential for designing and implementing relay wiring diagrams for Arduino. This connection forms the foundation for controlling relays and interfacing them with digital circuits, enabling various applications and projects.
Output Terminal
In a relay wiring diagram for Arduino, the connection between the relay's output terminal and the device being controlled is critical for achieving the desired functionality. This connection establishes the physical link through which the relay's switching action influences the operation of the device.
The relay's output terminal serves as a bridge between the Arduino's control signals and the device being controlled. When the Arduino sends a signal to activate the relay, the relay's output terminal connects to the device, completing the circuit and allowing current to flow. Conversely, when the Arduino deactivates the relay, the output terminal disconnects from the device, interrupting the circuit and stopping the flow of current.
Understanding this connection is essential for designing and implementing effective relay wiring diagrams for Arduino. Proper connection of the output terminal ensures that the relay can effectively control the device, whether it's a light bulb, a motor, or any other electrical component. Without a proper connection, the relay will not be able to switch the device on or off, rendering the relay wiring diagram ineffective.
In practical applications, the connection between the relay's output terminal and the device being controlled can vary depending on the specific requirements and capabilities of the device. For instance, some devices may require a specific voltage or current level to operate, which must be considered when selecting the relay and designing the wiring diagram.
Overall, the connection between the relay's output terminal and the device being controlled is a fundamental aspect of relay wiring diagrams for Arduino. Understanding this connection is crucial for ensuring that the relay can effectively switch the device on or off, enabling a wide range of control applications and projects.
Ground Terminal
In a relay wiring diagram for Arduino, the connection between the Arduino's ground pin and the relay's ground terminal plays a crucial role in establishing a common reference point for electrical signals and ensuring proper operation of the relay.
- Electrical Reference: The ground connection provides a common reference point for electrical signals in the circuit. It ensures that all components, including the Arduino and the relay, share the same electrical potential, enabling proper signal transmission and processing.
- Circuit Stability: A stable ground connection minimizes electrical noise and interference, which can affect the reliability and accuracy of the relay's operation. By providing a solid reference point, the ground connection helps to stabilize the circuit and prevent erratic behavior.
- Current Return Path: The ground connection provides a path for current to return to the power source, completing the electrical circuit. Without a proper ground connection, current cannot flow through the relay and the device it controls, rendering the relay ineffective.
- Safety: A proper ground connection helps to prevent electrical shocks and damage to equipment. By providing a defined path for current to flow, the ground connection minimizes the risk of stray currents and ensures the safe operation of the relay wiring diagram for Arduino.
Understanding the importance of the ground connection in a relay wiring diagram for Arduino is essential for designing and implementing reliable and functional circuits. Proper grounding practices contribute to the stability, accuracy, and safety of the overall system.
Normally Open (NO)
In a relay wiring diagram for Arduino, the connection between the relay's normally open (NO) terminal and the device being controlled is a fundamental aspect that determines the behavior of the circuit. The NO terminal plays a crucial role in establishing the initial state of the circuit and defining the relay's switching functionality.
- Initial State: When the relay is not activated, the NO terminal is connected to the device. This means that the circuit is complete, and current can flow through the device when the power is turned on.
- Switching Action: When the relay is activated, it switches the connection from the NO terminal to the normally closed (NC) terminal. This breaks the circuit and interrupts the flow of current through the device.
- Controllable State: By controlling the activation of the relay using the Arduino's digital output, it becomes possible to turn the device on or off remotely. This allows for automated control and remote monitoring of various electrical devices.
- Safety Considerations: In certain applications, the NO connection is used to ensure that the device is in a safe or "off" state when the relay is not activated. This is particularly important for safety-critical systems where unintended activation could lead to hazardous situations.
Understanding the connection between the relay's normally open terminal and the device being controlled is essential for designing and implementing effective relay wiring diagrams for Arduino. Proper consideration of the initial state, switching action, and safety implications of this connection enables the creation of reliable and versatile control systems.
Normally Closed (NC)
In a relay wiring diagram for Arduino, the connection between the relay's normally closed (NC) terminal and the device being controlled introduces another dimension to the circuit's functionality.
- Initial State: Unlike the normally open (NO) terminal, the NC terminal is initially connected to the device when the relay is not activated. This means that the circuit is complete, and current flows through the device when the power is turned on.
- Switching Action: When the relay is activated, it breaks the connection between the NC terminal and the device, and instead connects the NO terminal to the device. This interrupts the flow of current through the device.
- Fail-Safe Operation: The NC connection is often used to ensure that the device is in a safe or "off" state when the relay is not activated. This is particularly important in applications where unintended activation could lead to hazardous situations or damage to equipment.
- Controllable State: By controlling the activation of the relay using the Arduino's digital output, it becomes possible to turn the device on or off remotely, allowing for automated control and remote monitoring of various electrical devices.
Understanding the connection between the relay's normally closed terminal and the device being controlled is essential for designing and implementing effective relay wiring diagrams for Arduino. Proper consideration of the initial state, switching action, and safety implications of this connection enables the creation of reliable and versatile control systems.
Common Terminal
In the context of relay wiring diagrams for Arduino, the connection between the relay's common terminal and the Arduino's ground pin plays a crucial role in establishing a complete and functional circuit.
- Electrical Connection: The common terminal serves as a shared connection point between the relay's coil and the device being controlled. By connecting the common terminal to the Arduino's ground pin, the circuit is completed, allowing current to flow through the relay coil when the Arduino's digital output is set to HIGH.
- Ground Reference: The Arduino's ground pin provides a common reference point for the circuit, ensuring that all components share the same electrical potential. This stable ground reference is essential for proper operation of the relay, as it ensures that the relay coil receives the correct voltage and current to activate.
- Signal Control: The connection between the common terminal and the Arduino's ground pin enables the Arduino to control the activation of the relay. When the Arduino's digital output is set to HIGH, the circuit is completed and the relay coil is energized, causing the relay to switch its contacts. Conversely, when the Arduino's digital output is set to LOW, the circuit is broken and the relay coil is de-energized, causing the relay to return to its original state.
- Circuit Stability: A proper connection between the common terminal and the Arduino's ground pin contributes to the stability and reliability of the relay wiring diagram. By providing a solid electrical connection and a stable ground reference, the circuit is less susceptible to noise and interference, ensuring consistent and predictable operation of the relay.
Understanding the connection between the relay's common terminal and the Arduino's ground pin is essential for designing and implementing effective relay wiring diagrams for Arduino. This connection establishes a complete circuit, provides a ground reference, enables control of the relay, and contributes to the overall stability of the system.
FAQs on Relay Wiring Diagrams for Arduino
Relay wiring diagrams for Arduino are essential for interfacing relays with Arduino microcontrollers. Here are answers to some frequently asked questions (FAQs) about these diagrams:
Question 1: What is the purpose of a relay wiring diagram for Arduino?
Answer: A relay wiring diagram for Arduino provides a visual representation of the electrical connections between an Arduino and a relay module. It shows how to connect the Arduino's digital output pins to the relay's input and output terminals, enabling control of the relay using the Arduino's digital outputs.
Question 2: Why is it important to follow a relay wiring diagram accurately?
Answer: Following a relay wiring diagram accurately is crucial to ensure that the relay is connected correctly and safely. Incorrect wiring can damage the Arduino, the relay, or the device being controlled by the relay.
Question 3: What are the different types of relay wiring diagrams for Arduino?
Answer: There are various types of relay wiring diagrams for Arduino, depending on the type of relay and Arduino being used. Some common types include single-pole single-throw (SPST), single-pole double-throw (SPDT), and double-pole double-throw (DPDT) relay wiring diagrams.
Question 4: What are the key components of a relay wiring diagram for Arduino?
Answer: Key components of a relay wiring diagram for Arduino include the Arduino, relay module, power supply, digital output pins, relay input and output terminals, and ground connection.
Question 5: What are the safety precautions to consider when working with relay wiring diagrams for Arduino?
Answer: When working with relay wiring diagrams for Arduino, it is important to observe safety precautions such as using proper insulation, avoiding loose connections, and ensuring the power supply is disconnected before making any changes to the circuit.
Question 6: Where can I find resources for learning more about relay wiring diagrams for Arduino?
Answer: There are numerous online resources, tutorials, and documentation available to help you learn more about relay wiring diagrams for Arduino. Refer to the Arduino website, online forums, and technical articles for further information.
Understanding and accurately following relay wiring diagrams for Arduino is essential for successful implementation of relay-based control systems. By addressing these FAQs, we aim to provide a clearer understanding of these diagrams and their significance in Arduino projects.
Transition to the next article section:
Tips for Relay Wiring Diagrams for Arduino
Relay wiring diagrams for Arduino are essential for interfacing relays with Arduino microcontrollers. Here are some tips to help you create and use these diagrams effectively:
Tip 1: Choose the Right RelayThe first step is to select the correct relay for your application. Consider the voltage and current requirements of the device you want to control, as well as the type of relay contacts (SPST, SPDT, DPDT).Tip 2: Follow the Manufacturer's InstructionsRelay manufacturers typically provide detailed wiring diagrams and instructions. Carefully follow these instructions to ensure proper and safe operation of the relay.Tip 3: Use Proper Wiring TechniquesUse proper wiring techniques, such as stranded wire, solder connections, and heat shrink tubing, to ensure reliable and long-lasting connections.Tip 4: Test the CircuitBefore connecting the relay to your Arduino, test the circuit using a multimeter to verify that the connections are correct and that the relay is functioning properly.Tip 5: Use a Breadboard for PrototypingA breadboard can be useful for prototyping and testing relay wiring diagrams before soldering the connections permanently.Tip 6: Label the WiresClearly label the wires in your relay wiring diagram to make it easier to troubleshoot and maintain the circuit.Tip 7: Consider Optocouplers for IsolationIn some cases, it may be necessary to use optocouplers to isolate the Arduino from the relay circuit, particularly when working with high-voltage or noisy environments.Tip 8: Seek Professional Help if NeededIf you encounter difficulties or have concerns about the safety of your relay wiring diagram, do not hesitate to seek professional help from an electrician or experienced electronics hobbyist.Conclusion
Relay wiring diagrams for Arduino play a crucial role in interfacing relays with Arduino microcontrollers. They provide a visual representation of the electrical connections between the Arduino and the relay module, enabling control of various devices and systems using the Arduino's digital outputs.
Throughout this article, we have explored the key aspects of relay wiring diagrams for Arduino, including their purpose, importance, different types, and key components. We have also provided practical tips to help you create and use these diagrams effectively in your projects.
Understanding and accurately following relay wiring diagrams is essential for successful implementation of relay-based control systems using Arduino. By carefully adhering to the manufacturer's instructions, using proper wiring techniques, and testing the circuit thoroughly, you can ensure the safe and reliable operation of your Arduino projects.
Relay wiring diagrams for Arduino open up a wide range of possibilities for controlling and automating various devices and systems. Whether you are a hobbyist, a student, or a professional engineer, mastering these diagrams will empower you to create innovative and practical projects using Arduino.
Youtube Video: